Showing posts with label sewing. Show all posts

Wednesday, May 18, 2016

One Thimble Issue 11 - Crossover Flounce Dress

It's time for a new issue of One Thimble and I love the Crossover Flounce Dress from
Designs by Call Ajaire!

  
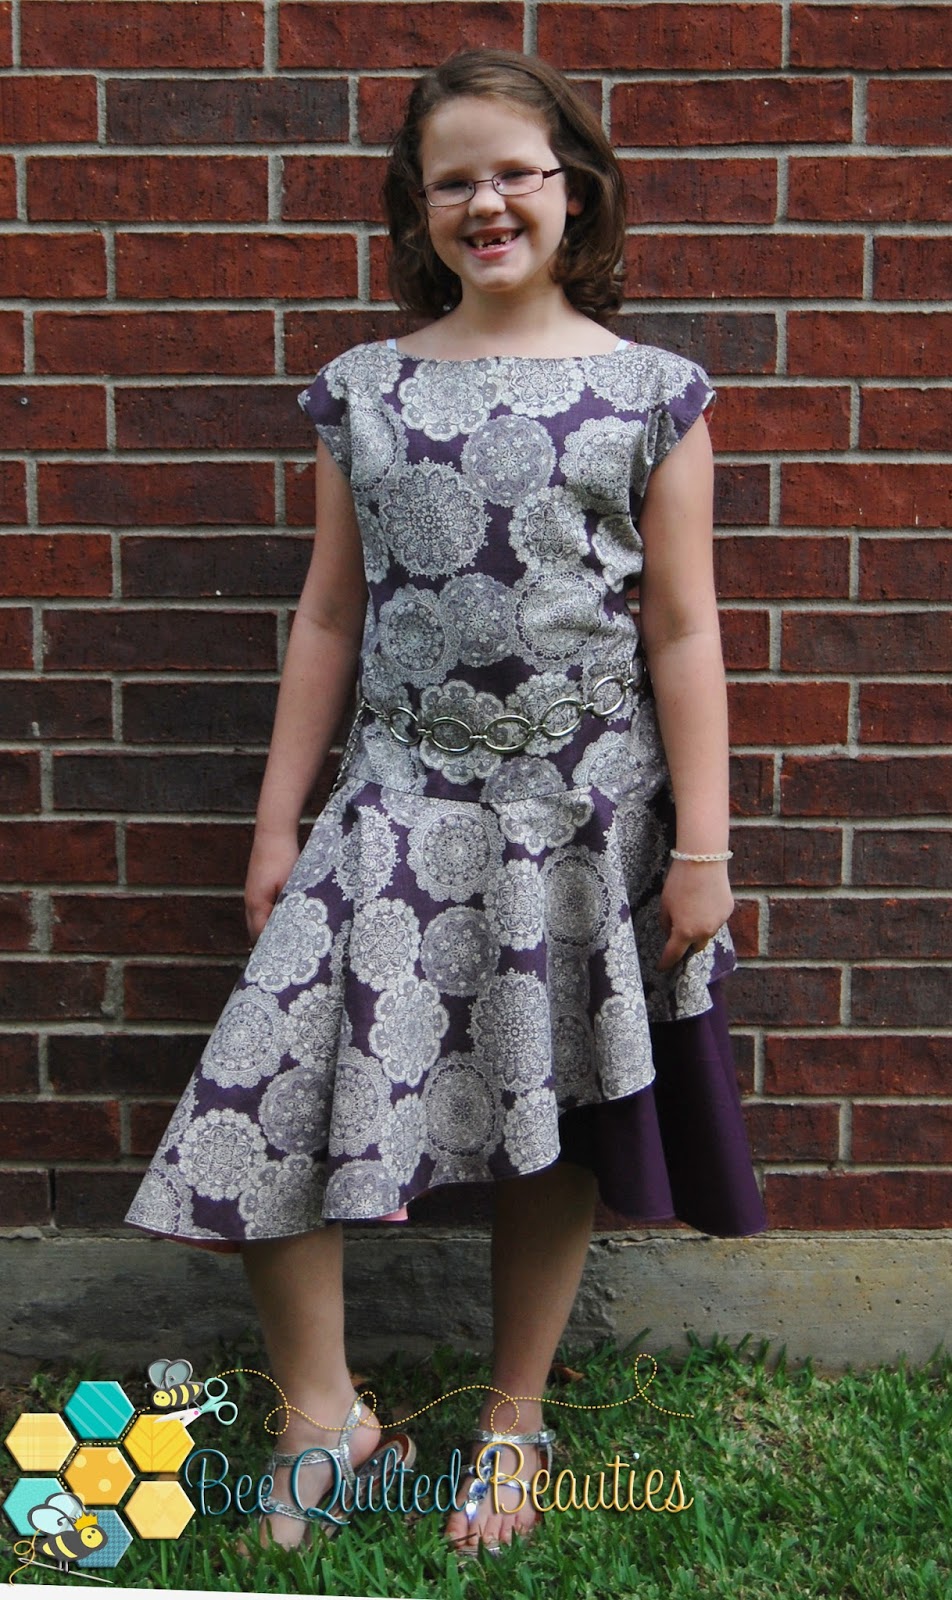
I chose this dress for the blog tour because Bitty Bee is hitting a growth spurt and is running out of dresses that she can wear to church on Sundays.  The Crossover Flounce Dress gives her two different dresses without taking up extra space in her closet.

I really love the asymetricical lines of the skirt, and the pop of contrast that can be added.


For the first side, I picked Tamara Kate's Nature Walk, which is perfect for spring and summer.  It's light and carefree, whimsical and fun.


For the second side, I went with one of the prints from Prima, from Quilt Gate.  It's a deep purple color and really makes a statement.

This dress features a double layer full skirt, which is perfect for girls who still love to twirl!


The construction of this one was like no other dress I've done, and it turned out perfectly!  I admit, I was scratching my head at a couple of the steps, but I was very happy when it all worked.  I think I have a new favorite method for making fully lined bodices!

Another favorite part of this pattern is that I didn't have to gather anything!  As a mom of a girl, quite a few patterns have ruffles.  Fortunately for me, Bitty Bee is starting to outgrow ruffles, but some patterns still have gathered skirts.  Because of the full circle skirt, nothing had to be gathered when making this dress, which speeds up the sewing process immensely.  Mainly because I don't sit around avoiding the gathering...

The pattern also has the option for making the dress with long sleeves, but since we live in Texas and it's the end of spring, long sleeves just aren't practical.  I'll plan another one in the winter, for her to wear during the 2-3 weeks that we will have cold weather.


Bitty Bee is in love with her new two-in-one dress.  What girl wouldn't love it?

Be sure to visit all of the stops on the One Thimble Issue 11 Tour for more sewing inspiration!


Monday, February 15, 2016

Bundle Up Women's: Sew Yourself Some Love!

It's Bundle Up time again!  This time, we got to sew ourselves some love, which in my sewing room, I don't sew for myself nearly enough!


I had been seeing so many women posting their "Knot Your Average" tops and loved the look, so I knew I wanted to make one for myself.  I looked around for something to pair it with and came across the Blank Slate Oceanside Pants.  They looked so comfy, I couldn't resist the chance to make a pair!


I have never really gotten along with sewing knits, so I'm on a mission to work with knits more.  This top was a great opportunity for me to spread my knit wings.  I used some of the Art Gallery knit that I had in my stash.  They're from different lines, but I liked how they looked together.

One of my favorite things about this pattern is that it has the option to make it breastfeeding friendly.  It also includes the instructions to make it into a maternity top/dress.


The Oceanside Pants are a wide leg, loose fit pant with a drawstring waist.  I made mine out of a medium weight denim fabric.

Since they are a loose fit, I could probably go down a size or two on them and have a better fit than I got with this first pair, but they are still comfortable in the size I made them.  The pattern goes by hip size because of the drawstring waist.

Come summertime here in Texas, I'll be making some more in the shorts version!  They are quick and easy to make, so whipping up more will be pretty fast.

I'm really happy with the two patterns I choose for this tour and I feel great that I was able to make myself some new clothes!  Bitty Bee usually gets all of the goodies from the sewing room.


Do you get to sew yourself some love?  It's a pretty great feeling.

Join us through the whole blog tour and don't miss a day!!!

Feb 1     Sew Thrifty
Feb 2     Feather's Flights
Feb 3     The Wholesome Mama
Feb 4     Sprouting Jube Jube        
             Sugarplum Cuties
Feb 5     Shaffer Sisters
Feb 8     Mabey She Made It
Feb 9     Rebel and Malice
Feb 11   Sugarplum Cuties
Feb 12   Hibbadoray
Feb 15   Bee Quilted Beauties       
             Mabel Madison
Feb 16   Sew Starly
Feb 17   All Things Katy            
             Handmade Boy
             Lady And The Gents
             Sew Like My Mom

Sunday, February 14, 2016

One Thimble Issue 10 Review

It's back!!!  One Thimble Issue 10 is now available and packed with some great patterns!


I chose a couple cute patterns for Bitty Bee, and I plan on making a few things for Gamer, too.


First, I tried the Jolie Skirt from FAM.  This was my first FAM pattern to make and I was very pleased.  The skirt has two options, either a pleated front or a flat front.  I made the flat front skirt out of some pretty Batik fabric I had gotten at Quilt Market.

I love that the pattern included an actual pattern piece for not only the skirt pieces, but also for the waistband, instead of just measurements.  To me, having pattern pieces for everything just makes cutting out so much easier.

The skirt was very simple to put together and took less than an hour from start to finish.  Bitty Bee wants to make more of them, and this is a pattern that she can easily make on her own (with supervision, of course).


I wanted her to have a shirt to match her new skirt.  I bought a plain t-shirt from the store and used the applique files from the Swoodson Says Adventure Flags (also in this issue) to show our creative side.  Freezer paper and fabric paint, plus some rhinetones, and she has an awesome custom shirt that perfectly describes her attitude.

I also made the Willow Dress from Bubby & Me for her.  For someone who has sewn her whole life, I don't have much experience with knit and I'm trying to change that.


I left the sleeve ruffles off when making this dress, Bitty Bee is starting to dislike them on her clothing.  Without the ruffle, the pattern opens up to possible color blocking with some contrast.  For this one, I kept it all the same.


Again, this pattern includes actual pattern pieces for all of the pieces, which makes cutting the fabric so much easier.

I also plan on adding some length to the bodice and making her some t-shirts with this pattern.

Issue 10 is full of great patterns, articles, and sewing advice.  Go pick up your copy today
or you can enter below to win a copy!


\

a Rafflecopter giveaway

Wednesday, December 23, 2015

DIY Kindle Cover Tutorial

Bitty Bee and Gamer are both pretty big readers, just like Hubs and I are.  So this year, for Christmas, I was able to get them each a Kindle.  I found them at Half Price Books for about $20 each.  I couldn't pass that up!  I've been spending some time loading them with books that I think they will enjoy and making sure they're ready to start reading right away.

But they needed something else.  Something to hold them and protect the screens.  I know my kids, they're kinda rough and tumble.  I'm sure the Kindles will be tossed in backpacks for road trips frequently.  But why go out and buy something when I can make it, right?


I spent some time searching Pinterest for tutorials and couldn't find one that I liked, so I decided to do my own thing.

Supplies:
Kindle/Nook/iPad/Tablet of Choice
Fabric (I used two Doctor Who fabrics, available on our website)
Cardboard
Stiff Felt
1/4" Elastic
Sewing Machine
Hot Glue Gun


First, you'll need to measure your device.  The Kindles that I have measure 4.5" x 6.5".
Add 1/4" to each of these measurements, for me, that resulted in 4 3/4" x 6 3/4".
Cut two pieces of cardboard out with that measurement.


You will also need to cut a piece of your stiff felt out the same size as your cardboard.


For the outer fabric, you will add 1/2" seam allowance to the height of the cardboard, in my case, giving me a height measurement of 7 3/4".  For the width, you will double the cardboard width, add 1/2" seam allowance to both sides, plus 1" for a spine.  For mine, it was (4 3/4 x 2) + 1 +1, giving me 11 1/2" across.


I also cut my lining piece to this same measurement.

If you are adding embroidery to the front, cut a piece of stabilizer larger than your cover fabric.  This will also serve as interfacing, giving the cover some added stiffness.  Do not trim or cut the stabilizer after you finish your embroidery, except to trim it down to the size of your cover fabric.  If you are not adding embroidery, then cut a piece of iron-on interfacing the size of your cover fabric and attach.

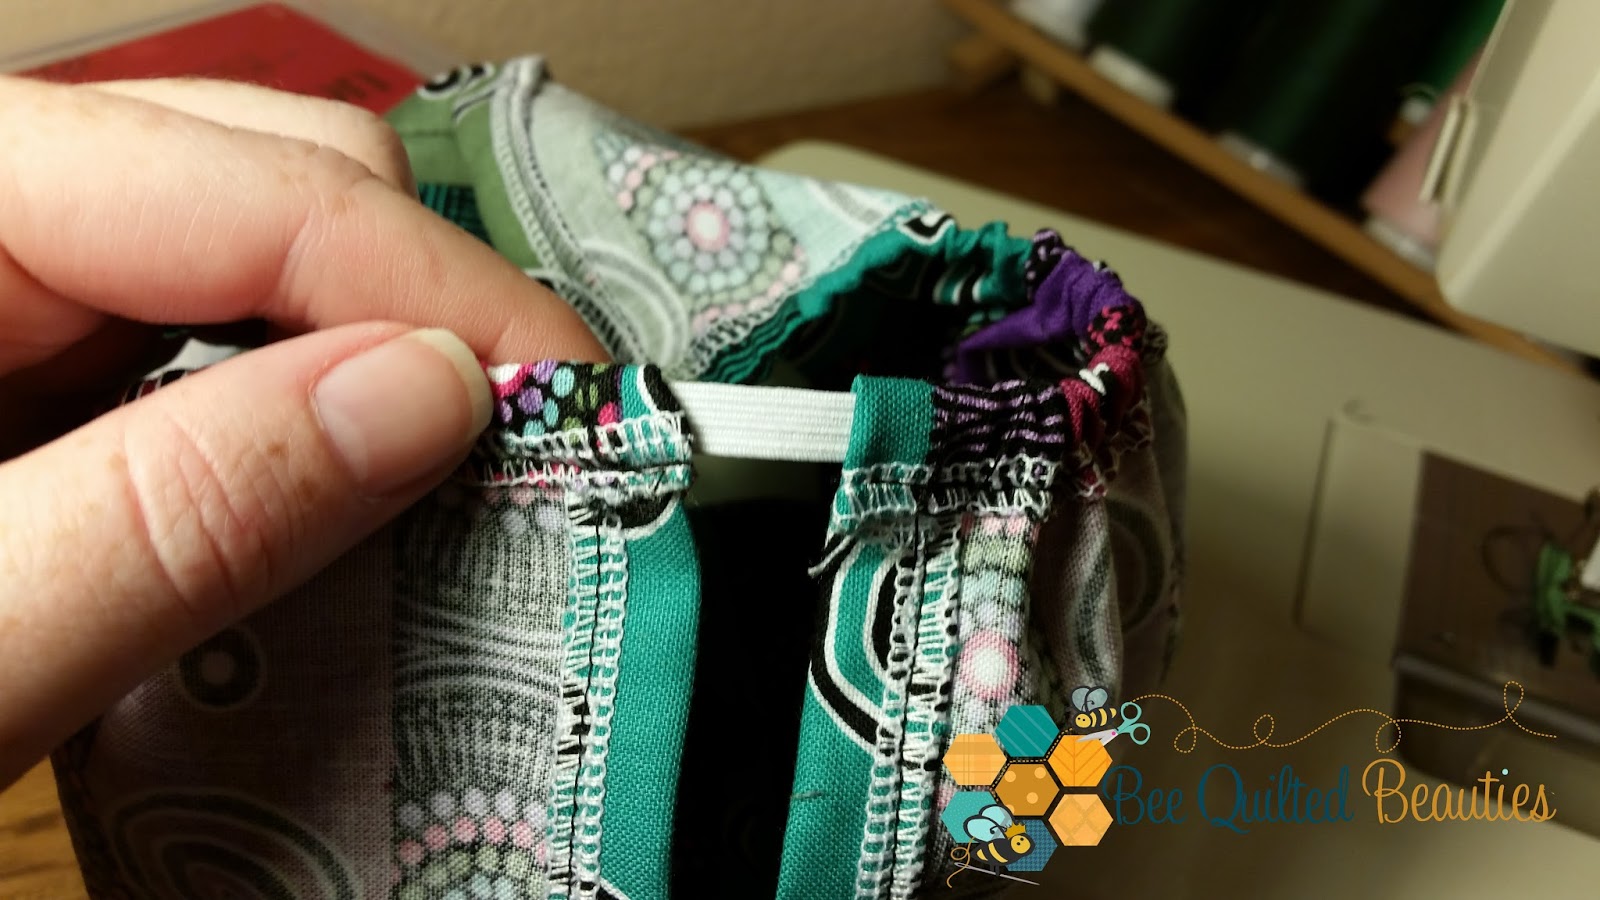
To keep the cover closed, I wanted something simple that won't get in the way.  An elastic band seemed to be the best option, no buttons or snaps to get in the way or cause annoyance, easy for them to slip the elastic over the cover when done reading.  Cut the elastic 1/4" longer than your cover height.  You'll want it to be snug when it's closed.  I cut my first one a little long, but it still works.


Pin the elastic about 1 1/4" from the edge of the short side that will end up being the back of the cover.  Pin the lining piece in place, right sides together.  Sew the three sides of the cover, leaving the short end that will be the front of the cover open.  It will look like a long pillowcase.

Clip the corners and turn the case right side out, then press.  Sorry, I forgot to take pictures of these steps.  If I make another one, I'll remember and add them later.

Slip one of the cardboard pieces into the cover, making sure it fits snugly and is all the way to the back seam.  Seam 1 in the picture is the seam along the edge of the cardboard, securing it in place.  I used my zipper foot for this seam.  Seam 2 is sewn 7/8" from Seam 1.  This creates a spine for the cover.


Now slip the second piece of cardboard in.  Tuck the open edge in around the cardboard, I found it best to fold the cover fabric in first, then fold the lining fabric in.  I used a hot glue gun to close this opening, that way there are no stitches showing.  You can also whipstitch it closed, but I'm not a huge handsewing fan.


Now set that part aside for a bit.  Take your felt and some more of your elastic.  I cut 4 pieces of elastic about 5" long each.  Place your tablet on the felt to find the best elastic placement for your device.  For the Kindle, I discovered that on the top corners, the elastic was best placed 1" over from the corner on both top and side.  For the bottom, however, I went in 1" on the bottom, but 2" up the side.  Tape the elastic in place and flip to the back side.  I used the hot glue gun to glue the elastic pieces in place along the back.


Left: Showing placement of the top elastics, 1" from corner on both top and side, also showing glued elastic at the top of the picture (from gluing the bottom pieces)
Right: Showing placement of bottom elastics, 1" over on the bottom and 2" up the side.


To attach the holder to the case, I once again used the hot glue gun.  I lined up the edge of the felt with the seam along the edge of the cardboard.  Make sure you glue all along the edges and the corners.  You can use a different glue, such as E6000, but you will need to make sure that you place something heavy on top of the glued area and allow it to dry completely, usually 24 hours.  I like how the hot glue dries so quickly and I can move on with my projects.


Congrats, you're done!  Slip your device of choice in the elastic and start reading!


I hope that Bitty Bee and Gamer like their Kindles and the new cases to go with them.  Now to get them wrapped and under the tree before they discover my present hiding spot!!!

~*~Princess Bee~*~

Tuesday, December 15, 2015

Bitty Bee's Simple Doll Shirt Tutorial

Bitty Bee loves her American Girl dolls, she has started making movies of their adventures, at least one will join us on family trips, and she's constantly wanting to add girls to her family of dolls.

One thing she thinks she needs more of is clothes for the dolls.  She loves changing their outfits and thinks that they shouldn't have to wear the same outfit twice in one year.  The horror!!!

Kirsten and Samantha are both wearing Bitty Bee's Simple Top
Tutorial for the simple wrap skirt here.

Bitty Bee is also learning how to sew, and I wanted to give her an easy project that she can do on her own with little help from me.  A long time ago, I downloaded a free simple doll shirt pattern and now it's nowhere to be found online, so I would like to share my version of this little doll top.


Supplies:
Fabric (Can use a fat quarter)
1/4" Elastic - 9"


I like making a template for smaller pattern pieces, since to me, it makes cutting easier.
You will need to cut two pieces 8 1/2" x 10 1/4".


Finish the edges of both sides and the top.  This is easiest done on a serger, but you can also use a zigzag stitch on your sewing machine.


Press the top edge down 1/2".


Unfold the pressed edge and measure down 4" from the top.
You will sew from that mark to the bottom.


Press the side seams open and stitch down the pressed seams.  I used a 3/8" seam allowance.


Re-fold the top along the pressed edge and sew your casing, using a 3/8" seam allowance.


Thread your 9" of 1/4" elastic through the casings, going straight from one side to the other.
Overlap the ends and sew together.  Work the elastic into the casings so that it's even on both sides.
None of the elastic will be showing.

For the hem, I finished the bottom edge and folded the finished edge under one time, then sewed in place with a 1/8" seam allowance.

Congrats, you're done!


This top looks adorable with leggings or tucked into a cute wrap skirt.
Nellie looks adorable, pairing it with black leggings and faux fur slouch boots.

Happy Sewing, Beauties!

~*~Princess Bee~*~

Thursday, November 19, 2015

One Thimble Issue 9 Review


It's here!  One Thimble Issue 9 has been released and it's packed full of sewing goodness!

One Thimble is an e-zine packed full of patterns (usually 6-10 per issue), tutorials, sewing articles, and tips on growing your sewing business.  Each issue costs $25 AUD (approx. $18 US), which is a great deal for all that's included!  Plus, you get exclusive coupon codes just for OT readers!


In this issue, you will receive the following 14 PDF patterns/tutorials:
  •  Cross Bow Dress (size 0-8)
  •  Pseudo Smocked Romper (size nb-3)
  •  Ringmaster Top (size 1-10)
  •  Ringmaster Pants (size 1-10)
  •  Timeless Treasure Skirt (size 1-10)
  •  The Carnival Jacket (size 3-12)
  •  Vincent the Victor Free Motion Applique
  •  Trapeze Eloise Free Motion Applique
  •  The Statement Clutch
  •  Good Fortune Headwrap
  •  Festive Felties *
  •  Cheeky Monkey Softie
  •  Vintage Circus Sit Upon
  •  Circus Toss Game

*Requires hand-sewing
In the e-zine you’ll find 27 articles & tutorials, including the following:
  •  How to insert an invisible zipper
  •  How to get perfect points when sewing Half Square Triangles
  •  How to make an I-spy bag
  •  How to make a velcro back bow tie and toy tutu
  •  How to make a Hoop Tent
  •  How to make an insulated lunch bag
  •  How to fussy cut
  •  How to get your Sewjo back
  •  How to photograph flatlays
  •  Trending fabrics and much more


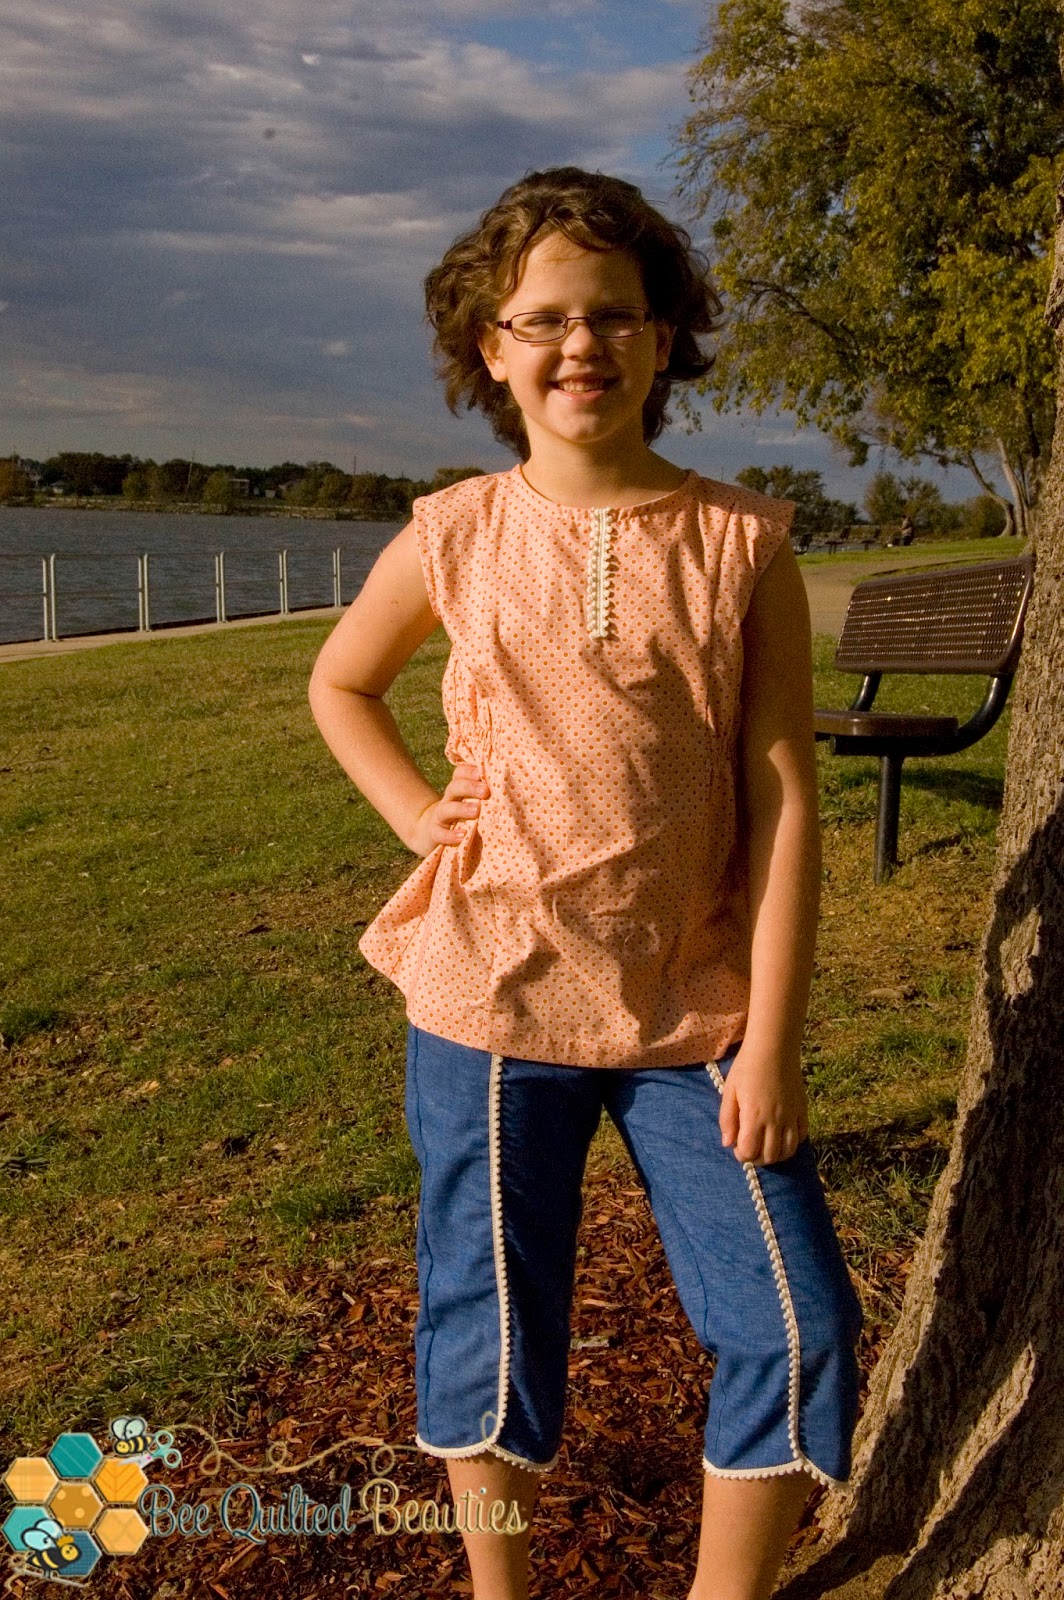
I was so excited to join in on the release blog tour and chose three patterns from the e-zine to make and review.  Looking through the options, I fell in love with the Ringmaster Top and Pants right off the bat.

Bitty Bee is growing up, and with that, she's not as fond of ruffles as she once was.  I made a few small adjustments to make her smile.


On the Ringmaster Pants, instead of doing the ruffles, I found a really cute off-white trim.  I made them out of some denim from my stash, and though you can't see it in the pictures, the waistband is the same fabric as the Ringmaster Top.

The Ringmaster Top originally had a small ruffle as trim on the front, but I took the trim I used on the pants and doubled it up to pull the whole outfit together.


Bitty Bee loves this outfit and I especially love the Ringmaster Top.  The elastic on the sides do a nice job of pulling it in and giving it a nice shape.  I'll be adding a lot of this style to her wardrobe in the future!  And this is one that she will probably be able to make on her own.  She has been doing really well in her sewing classes and now has her very own sewing machine!


I also made The Statement Clutch from Two Pretty Poppets.  I had never made one of their patterns before, and I was pleased with how it came out.  I did make a few changes, since it's for Bitty Bee.

Right now, she's all about having purses and bags and backpacks, so I added a second D-ring to the other side of the clutch, so that I could add an adjustable strap, making it more like a mini-messenger bag.  I also used a magnetic snap closure on it and added an iron-on patch that I made out of an Urban Threads embroidery design.

The other modification I made was adding a divider inside of the clutch.  This was a simple mod, I used the main bag pattern piece to cut my divider and then basted it onto the back lining piece before sewing the two lining pieces together.  Then I just followed the remaining directions.


And now the fun part!  You can win your own copy of One Thimble Issue 9!


Also, be sure to visit all of the other stops on the One Thimble Issue 9 Tour 
for lots of great sewing inspiration!


Tuesday, November 3, 2015

Quilt Market Review Part 3


We didn't just look at fabric while at Quilt Market!  We saw so much while there, and will be making some fun new additions to the website!


We saw quite a few vendors with some really pretty trims!  We bought some at Quilt Market to put on the website now and will be ordering more in the future.


One of the ribbon companies we talked to was Renaissance Ribbon, and we already placed our order for the Tula Pink Chipper ribbons.  Those will be in around the same time as the fabric, which we're very excited about.  We will also be ordering more ribbons from them in the future.


Books and patterns!  Lots of great books and patterns!  Books for bags, books for quilts and books for clothing ensure that each and every one of our customers will find something they like.


I love that more designers are coming out with women's patterns, we saw some great ones at Quilt Market and you'll start seeing them on the website soon.  I'll also be making some samples for myself to feature on the blog.

So many great things are in our future, we have been so blessed that our little fabric shop is growing and expanding over the last 3 years.  We can't wait to see what our next year brings!

~*~Princess Bee~*~


Friday, October 30, 2015

Quilt Market Review Part 2


Part 2 of the Fall Quilt Market Review!  I have more fabrics that we saw in Houston, some of them have already been ordered, some will be up for pre-order in our group soon.

Do you have a preteen or teen girl in the house?  Does she know who the band Teen Hearts is?  The lead singer of Teen Hearts, Kelly Orr, has designed a fun, uplifting line of fabric for girls that Bitty Bee is already in love with!  


Such fun and bright prints, I can't wait to get this line in and start working with it!

Moda!!!  We ordered quite a few Moda lines, including the ones shown below.  One of them has a super fun mermaid panel to make a stuffed mermaid, pillow and quilt.  Also, some bright and colorful wovens!  The colors really pop on the wovens, designed by Luke Haynes.  If you don't know who Luke Haynes is, check him out on Instagram.  He's an extremely talented quilter.


Tamara Kate has a new line coming out called Nature Walk.  It's adorable in person, perfect for babies and younger children!  Preorder will be up soon for Nature Walk.


Finally, Ghastlies is back!!!  More fun prints of our favorite spooky family!  We really liked looking through the new designs for Ghastlies and will be posting the preorder soon.

I love the skulls!


Check back over the weekend for more of my Market Review, next time I'll be posting some of the notions, patterns and books that will be added to the website soon.

~*~Princess Bee~*~